Start with the right tools
Just because you don’t have the time or budget to hire a professional designer, doesn’t mean you can’t create a website for your experience business that looks beautiful and is paired with a high converting booking journey for your customers.
With our free website themes, you get all the tools you need to build and launch your website fast. Easol themes are website templates designed by world-class designers, SEO and user experience experts, to sell any experience, anywhere. That means all the work of creating website layouts is already taken care of – all you need to do is configure and customise the theme with your brand assets.
Don’t have brand assets? No problem. In this guide, we’ll show you how to design a cohesive visual brand identity, from your typography system to your colour palette, and create a killer website for your experience business.
1. Define your brand’s messaging
Every great brand identity stems from a strong brand message or value proposition. This will help give your brand assets a clear direction to work towards. To define your brand’s message, think about:
Your mission – why are you creating and selling your experiences?
Your customers – who are you creating these experiences for?
Your values – what beliefs help you achieve your mission?
Your brand personality – if your brand was a person, what personality traits would they have?
Your unique positioning – what makes you different from other similar businesses?
Use your answers to craft a short and memorable tagline that sums up what your business does. This can act as the main heading for your website. The tagline should also speak to the vibe you’re trying to create with your brand assets.
Here are some tagline examples for inspiration:
If you ever get stuck during the design process, ask yourself: “Does this fit my brand’s message?”
2. Find inspiration
Starting with a blank page is daunting for most designers, let alone non-designers. That’s why many professional branding experts and designers take the time to find inspiration and references.
Use platforms like Pinterest, Dribbble, Siteinspire and Instagram to search for words from your brand messaging. These images will help you create a mood board.
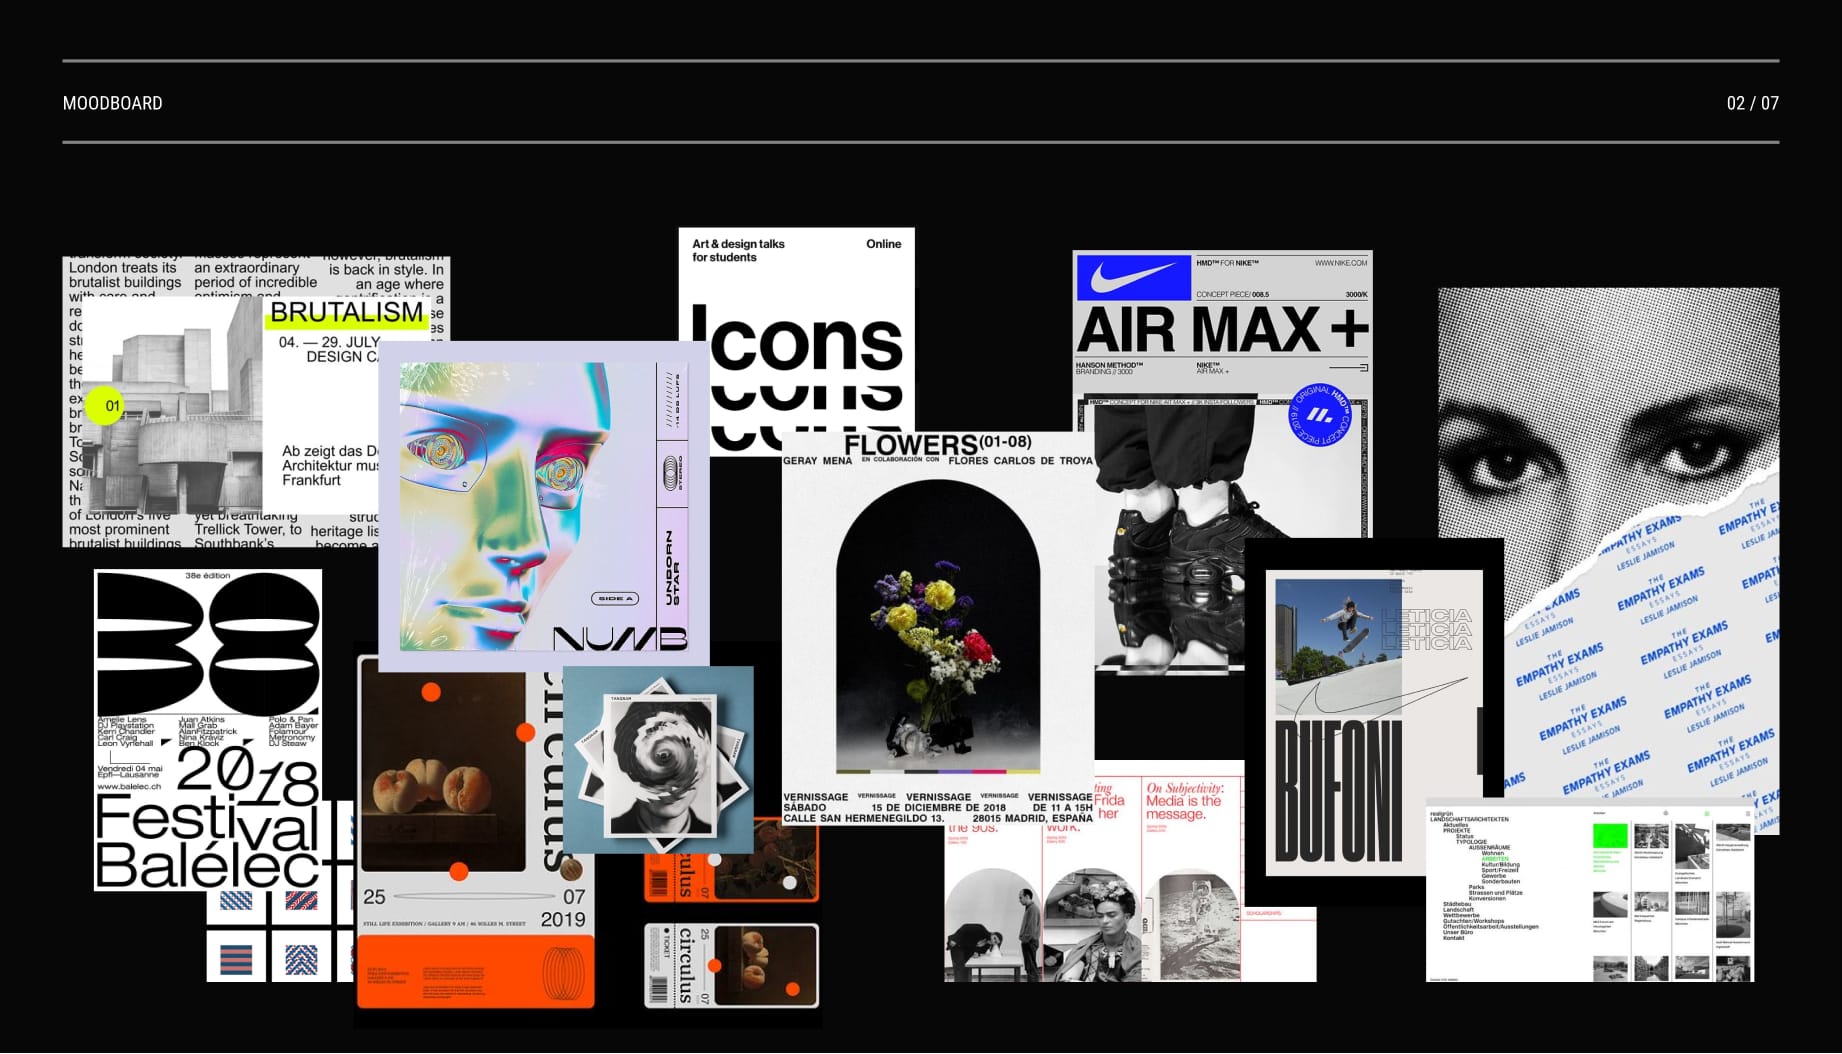
Your mood board doesn’t have to just consist of websites. It can also include photography, posters, album covers, book covers, illustrations – anything visual that speaks to your brand and inspires you.
Don’t forget to look at direct competitors, as well as creators and brands that are in your general industry. For example, if you’re launching a yoga retreat, consider wellness brands in fashion and food.
It may also be helpful to keep references of images and websites that you don’t like and feel “off-brand”. This can provide some extra clarity so you know what to avoid in the next steps.
3. Pick your fonts
Words make up a good chunk of your website, so the font you pick can make a huge difference in how your overall website looks and feels. You’ll need to look for a font family for headings and body text.
There are five main categories of fonts to choose from:
Serif fonts contain those extra little strokes (serifs) at the end of the main vertical and horizontal strokes of some letters. They give a typeface a more classical or elegant look. Examples include Times New Roman, Georgia and Garamond.
Sans serif fonts, like Helvetica and Arial, don’t have serifs. Designers tend to reach for them to create a more modern, sleek, and minimalist aesthetic.
Handwriting or script fonts, like Allura and Pacifico, mimic handwriting, typically in a cursive style. Depending on the typeface, it can give a brand a more luxurious or human touch.
Display fonts are specifically designed for headings in large font sizes. Each display font has their own unique feature to make a bold statement. Examples include Playfair Display and Cooper Black.
Monospace fonts, such as Courier and Inconsolata, contain letters and characters that take up the same horizontal space. They’re traditionally used in typewriters and programming code, so we’ve come to associate them with a retro or techy vibe.
There are a lot of great resources and type foundries that offer quality fonts for free. Check out Google Fonts, Velvetyne, Open Foundry and Free Faces to get started.
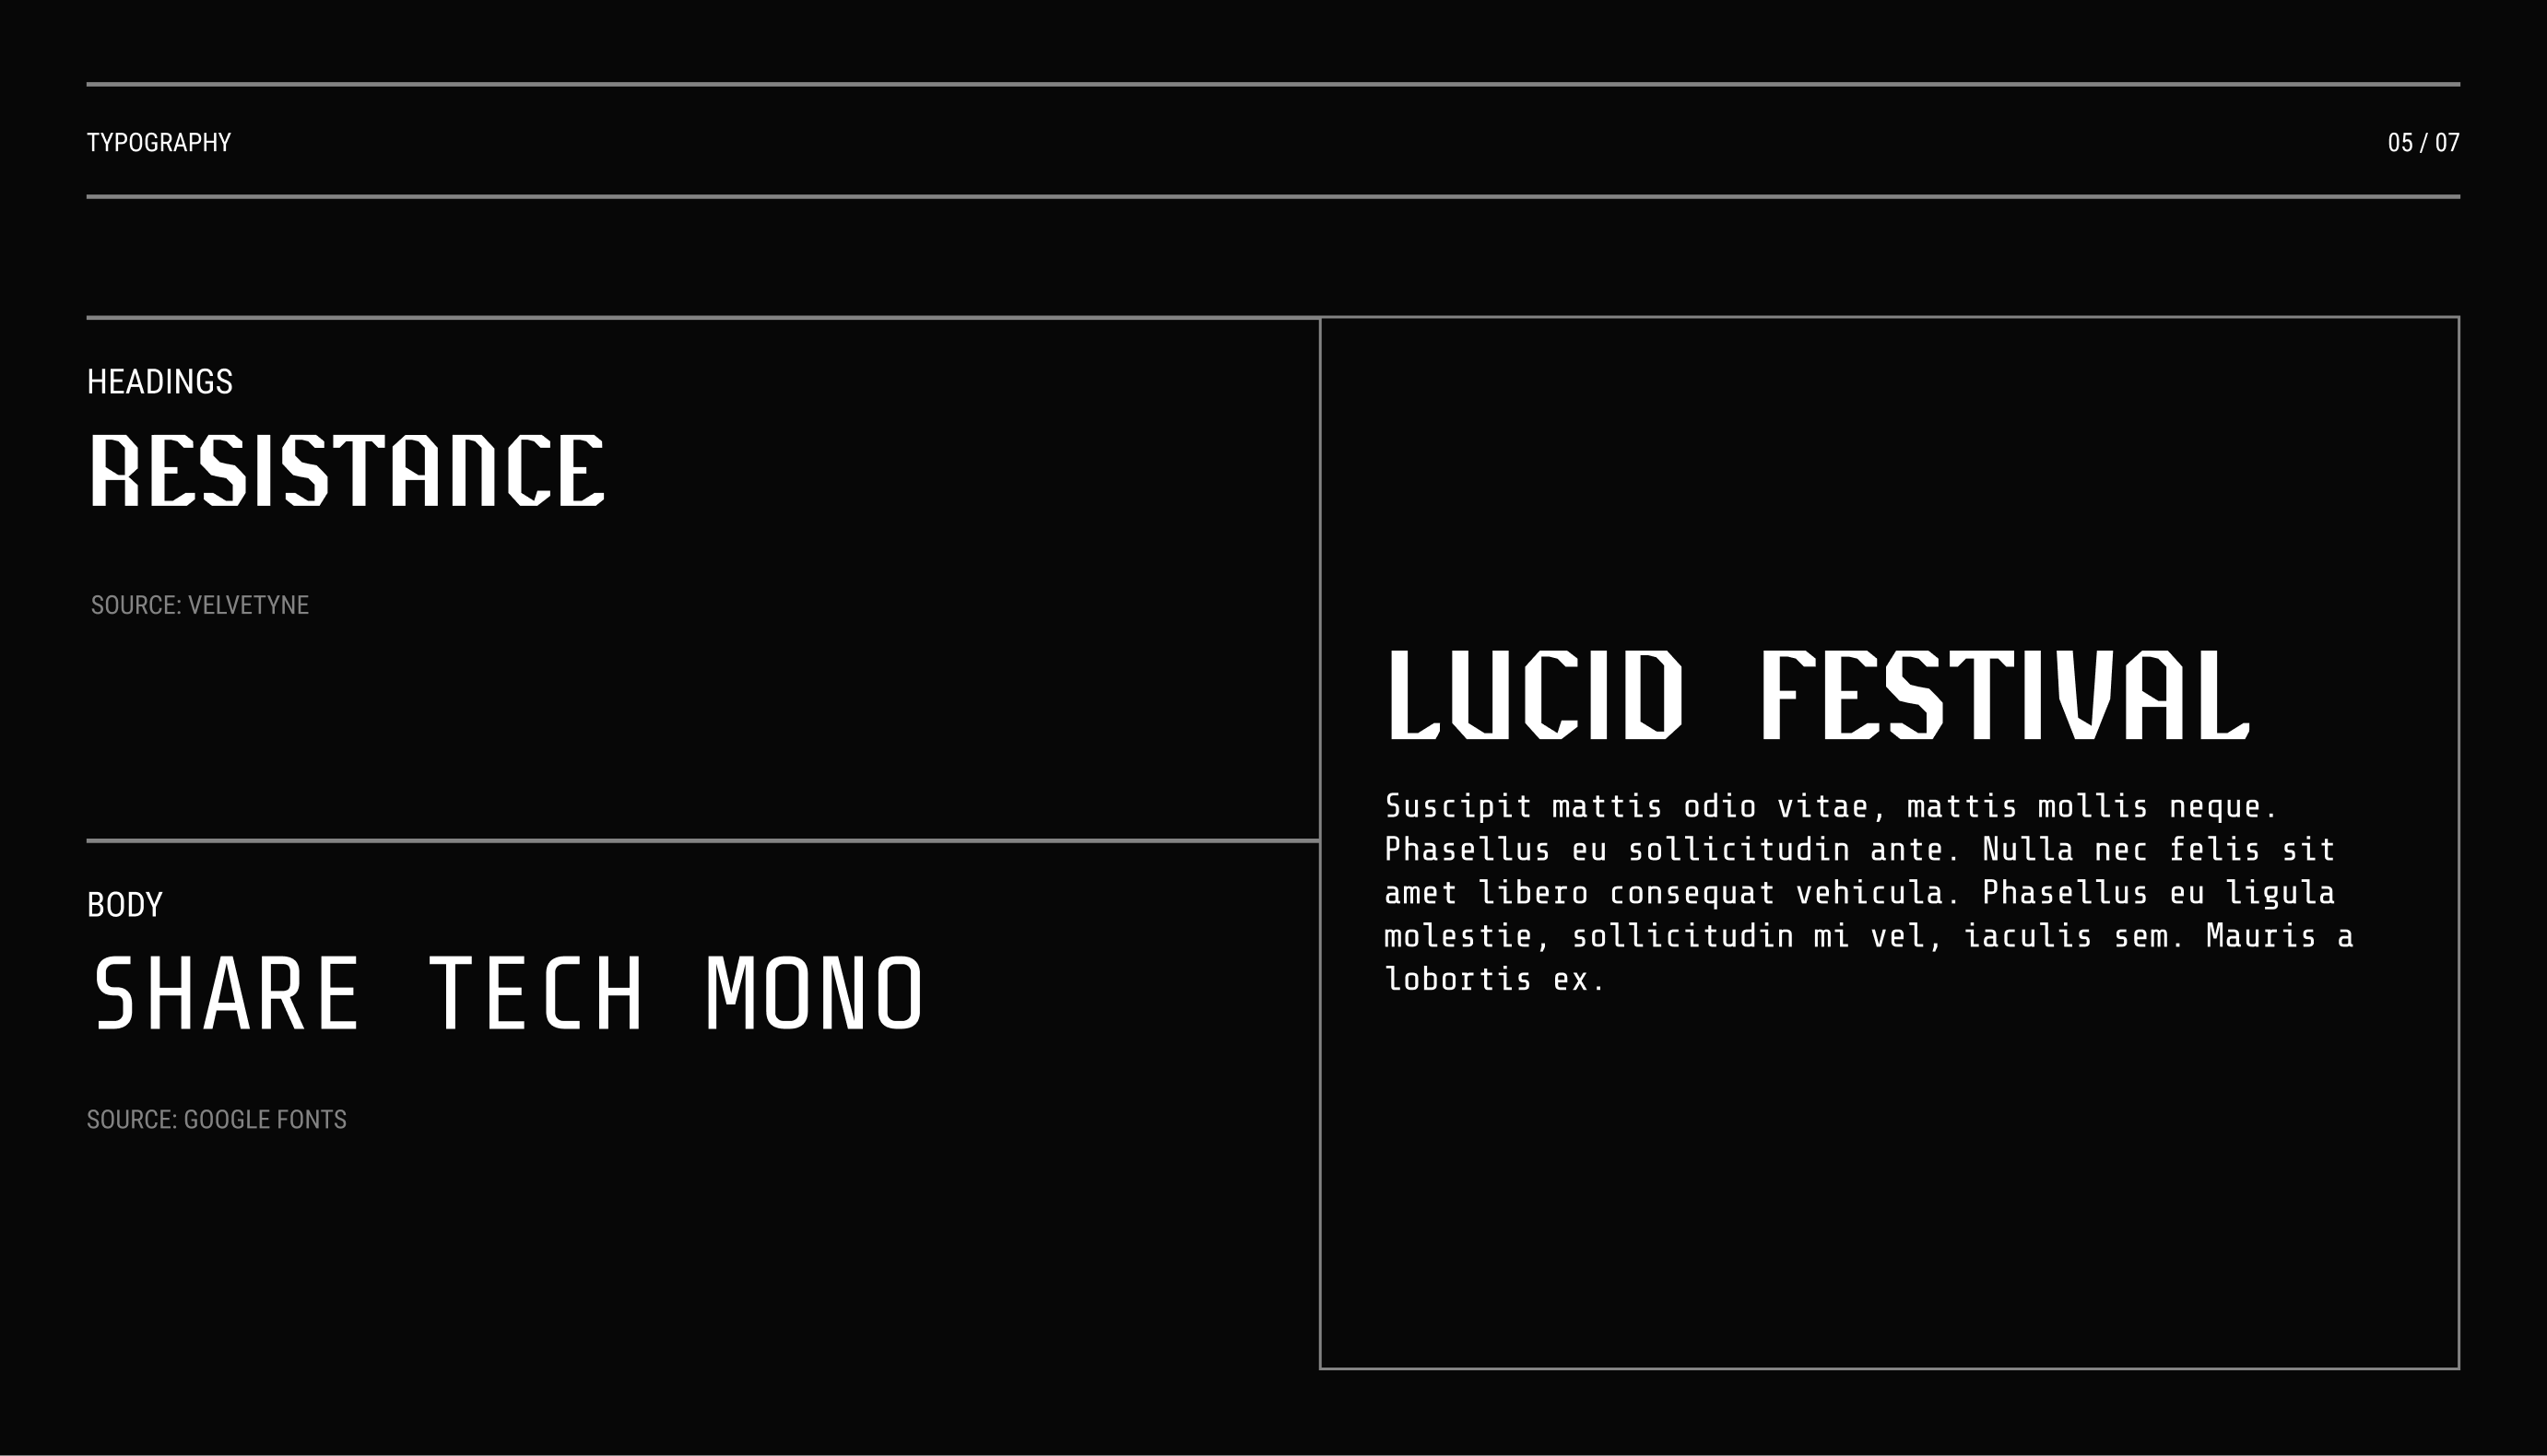
With so many fonts out there, it can get overwhelming real quick. Here are some tips and principles to help you find the right one:
Look back at your mood board and see if a specific type of font keeps popping up – consider finding a similar typeface.
Choose a font for headings first as it’s the typeface people will read the most. Once you’ve settled on a font for headings, you can find a complementary body font. Make sure that it’s legible at smaller sizes (12-16px).
When pairing heading and body fonts, aim for visual contrast (avoid using near-identical typefaces), but not so much that they’re clashing.
If one of your fonts has a lot of personality (usually the heading), use something more neutral for the other typeface.
Use your brand name, tagline and copy when testing fonts – not lorem ipsum or other placeholder text. You want to make sure that the words you’re writing most often will look the way you want.
When in doubt, stick to tried-and-true font pairings and popular typefaces – there’s a reason why they’re used so often. Check out Typewolf and Figma's Google Font Pairings for recommendations on typeface combinations.
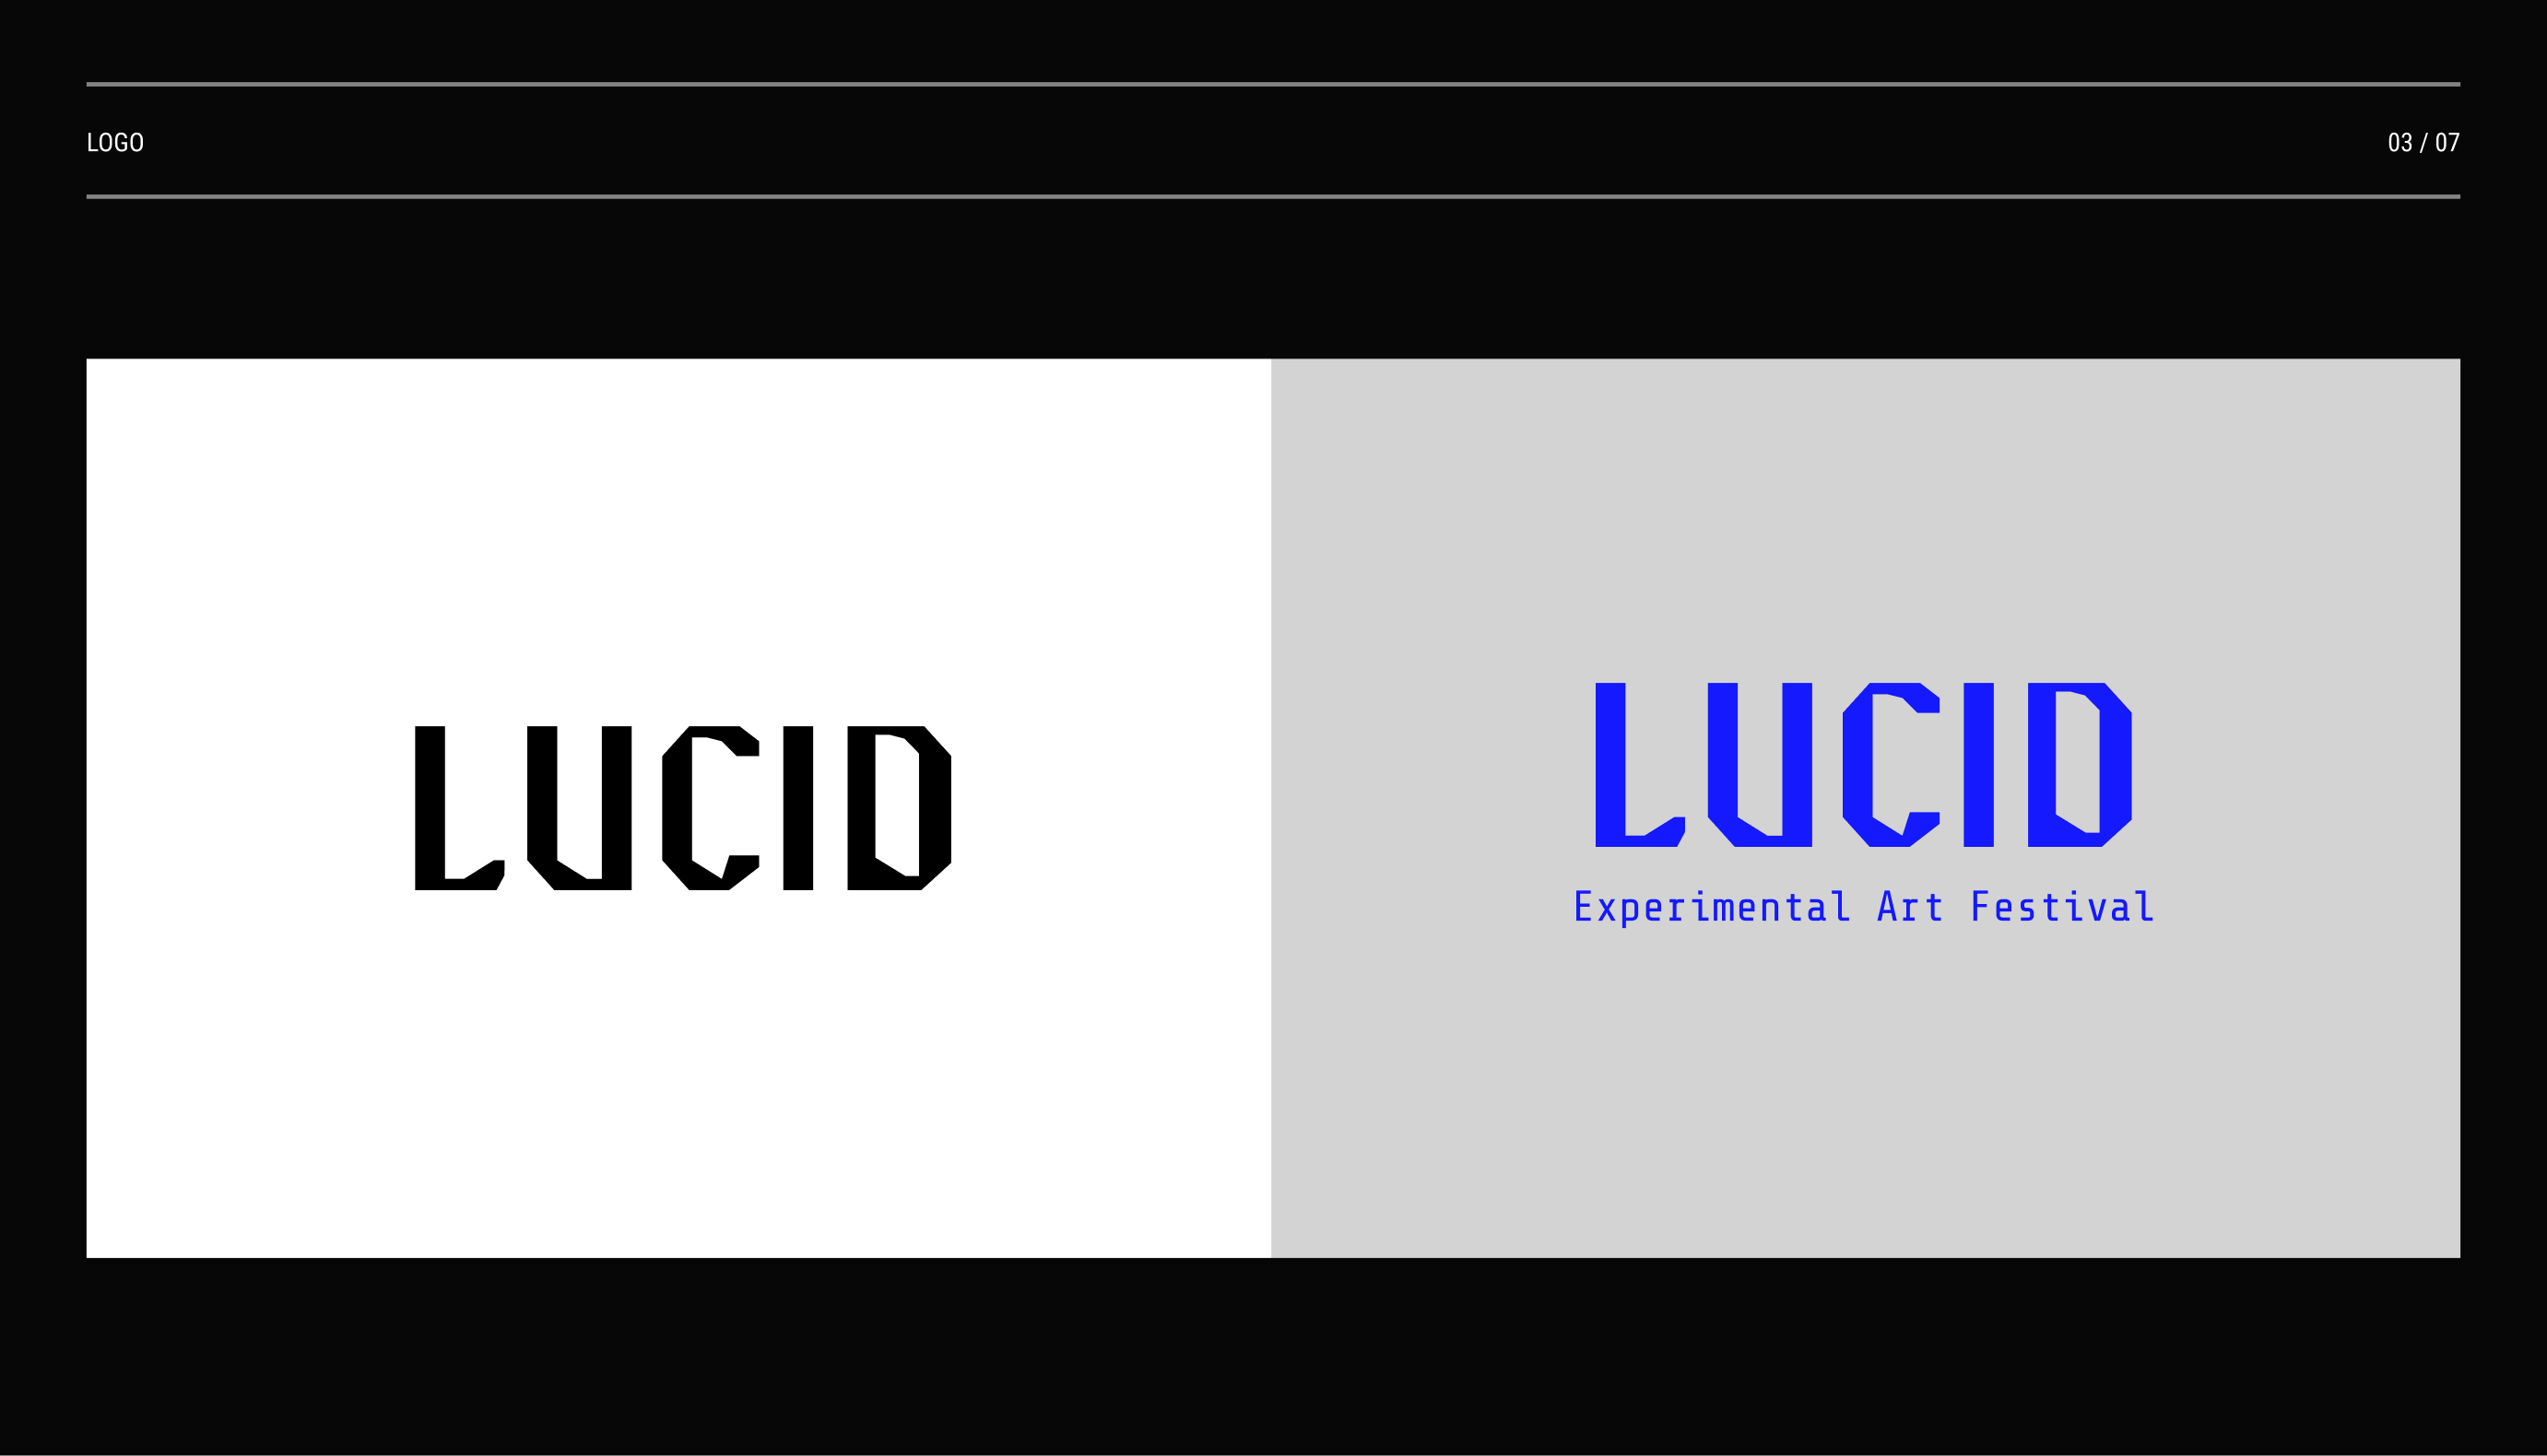
4. Create a colour palette
Colour is a powerful component to help set the vibe of your brand.
To start, return to your mood board and see if there’s a common colour scheme or a specific hue that keeps popping up. Put those colours into a tool like Coolors, Colormind, Adobe CC Color or Paletton and it’ll generate a colour palette for you.
If there’s a particular image that embodies your brand well, you can upload it to Canva’s Colour Palette Generator and it will automatically pull the image’s colours and create a palette. You can also explore Pinterest and MyMind for curated colour palettes for more inspiration.
No matter which tool you use, you should look for a:
Primary colour that acts as the main colour people will associate your brand with. This is usually a more saturated, bright colour.
Secondary colour that blends well with your primary colour. If you look at the colour wheel on Paletton or Adobe, consider an adjacent or complementary colour. It could also be a tint or shade of the primary colour.
Site background colour that will be used for the background of your website. Stick with a softer, neutral colour so that your primary and secondary colours can stand out.
Site text colour that will be used for the body text of your website. Make sure there’s high contrast compared to the background colour to maintain good readability.
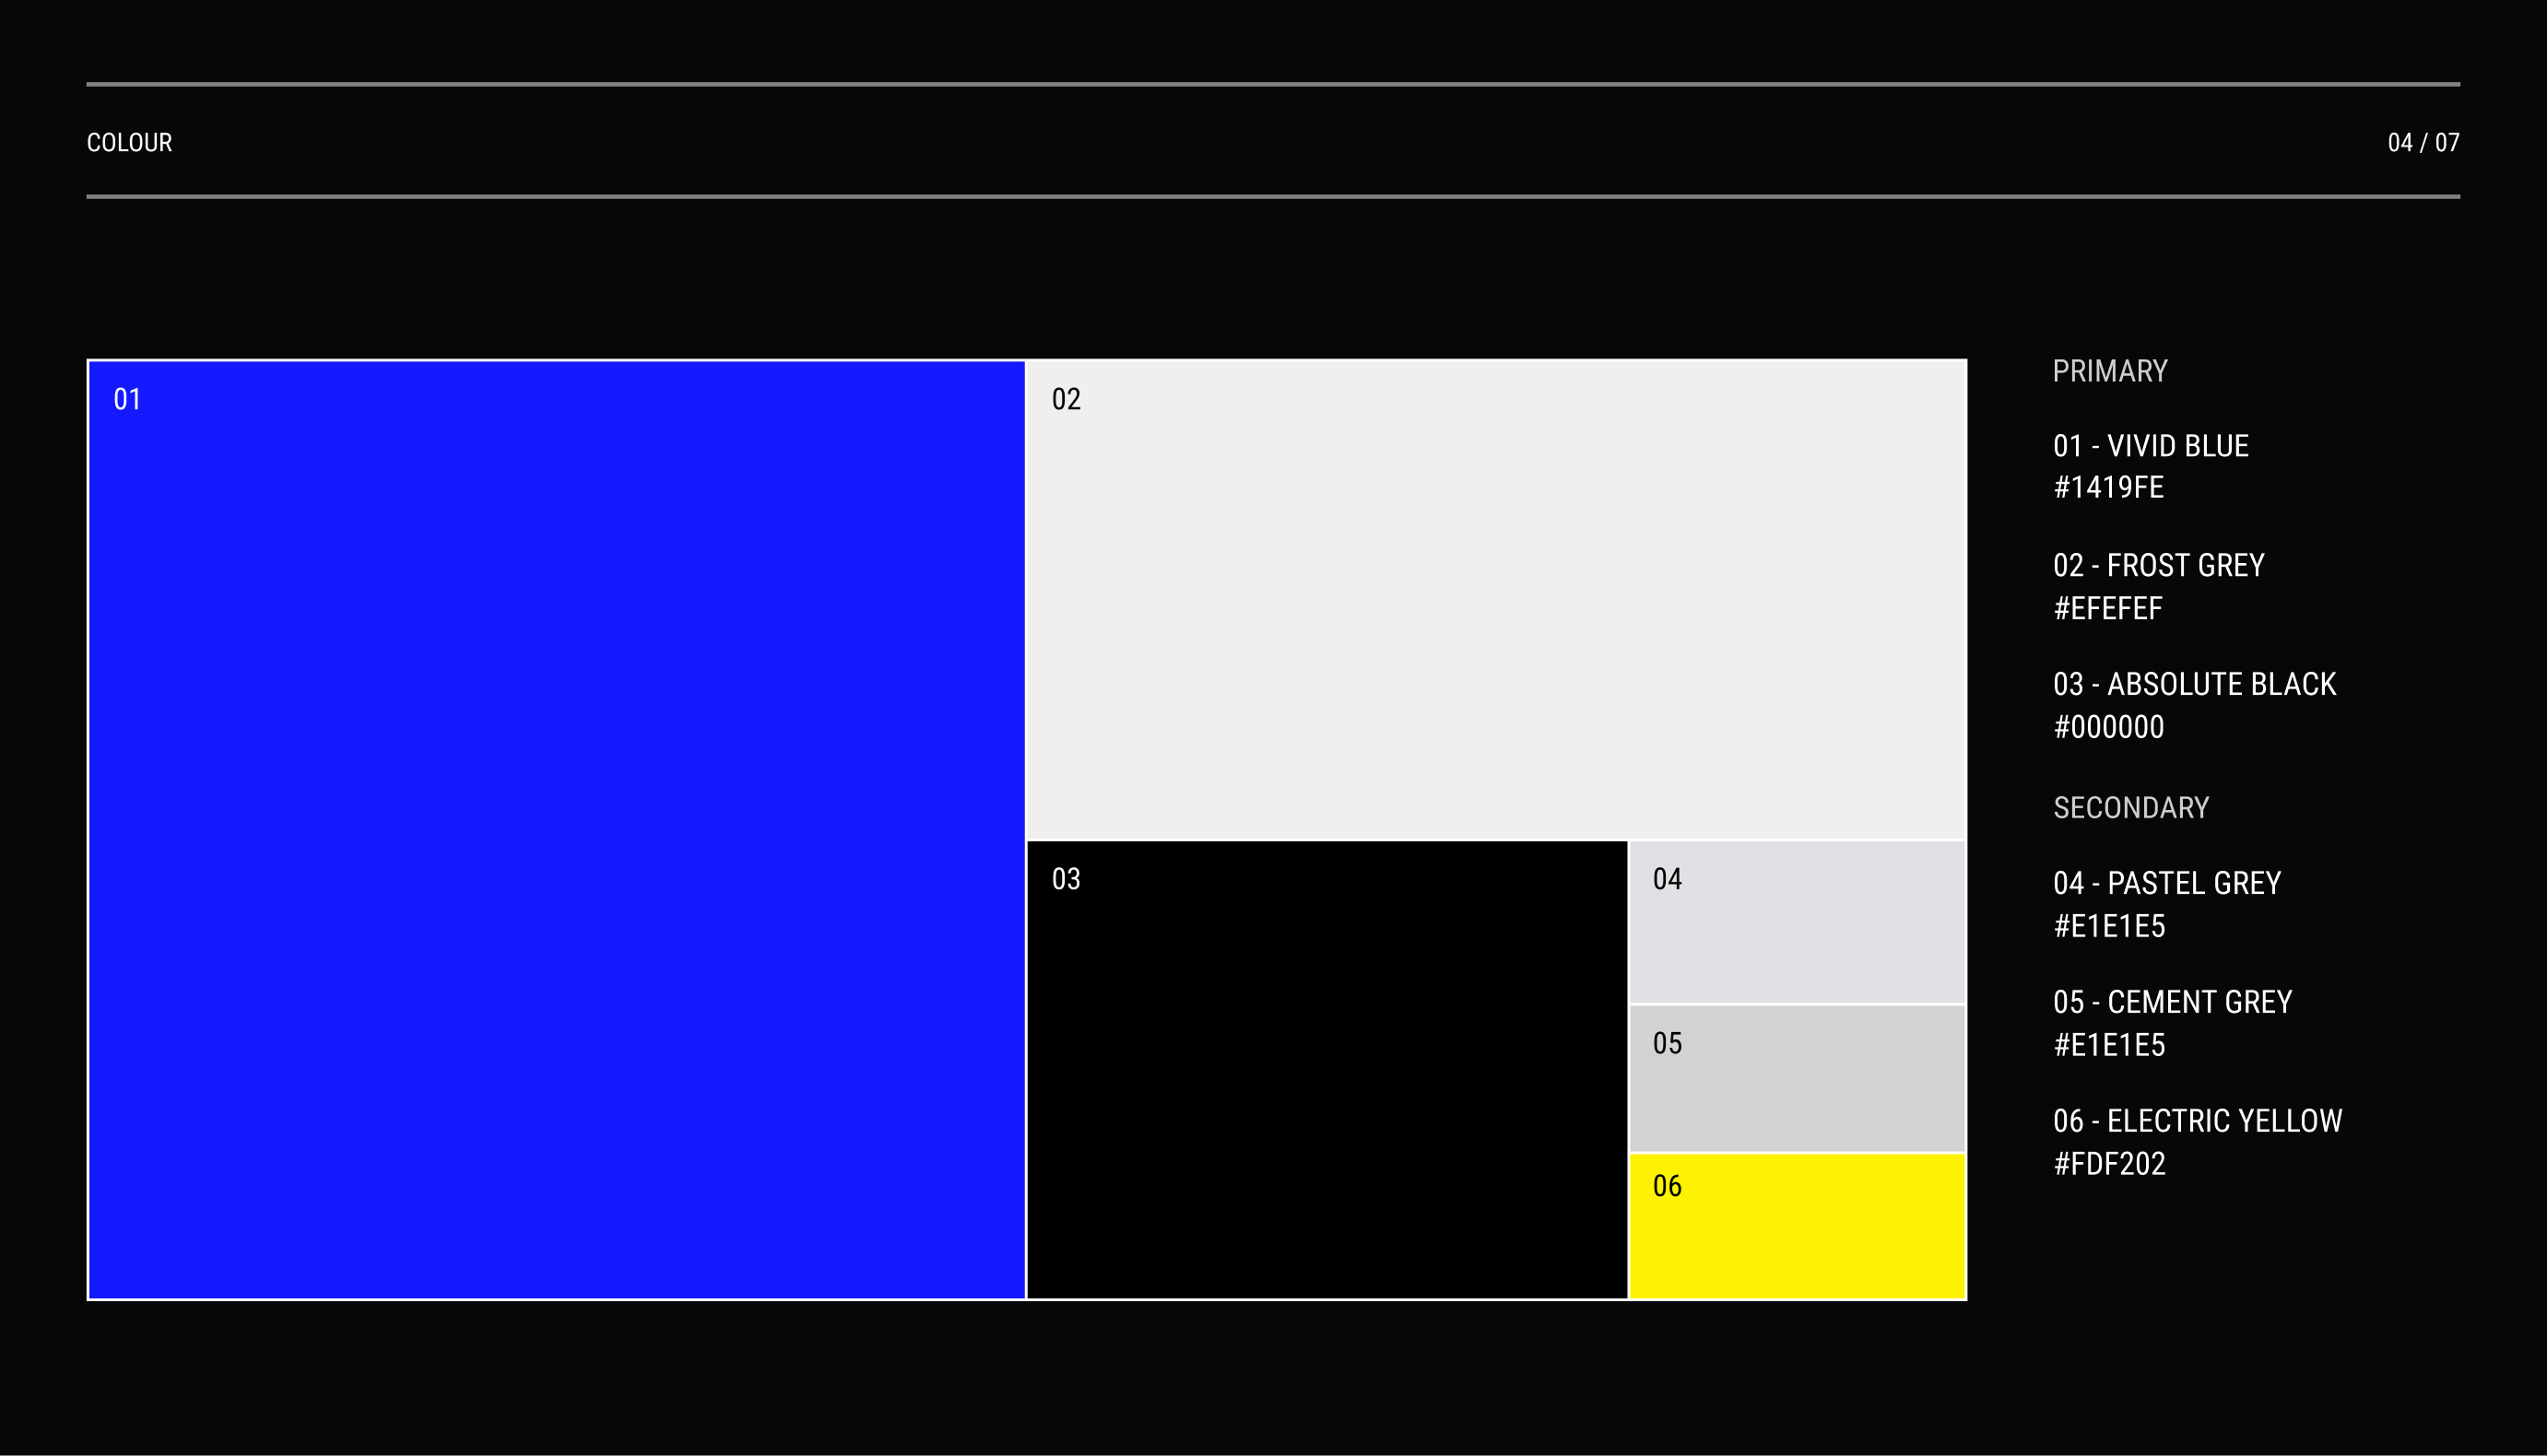
5. Make a logo
If you don’t have a logo, you can make a simple wordmark with free design tools like Figma or Canva. Wordmarks are a distinct, text-only logo for brands. To create one, use your heading font and type out your brand name. You may want to play around with the letter case (like using all uppercase or lowercase) or use initials if your brand name is particularly long.
We also recommend creating different variations of your wordmark with your colour palette, so that you have options when placing your logo on dark and light backgrounds.
6. Get photos
The right imagery can turn a bland website into something memorable and striking. It’s a simple thing that can elevate your brand and, crucially, help customers visualise your experiences, persuading them to make a booking.
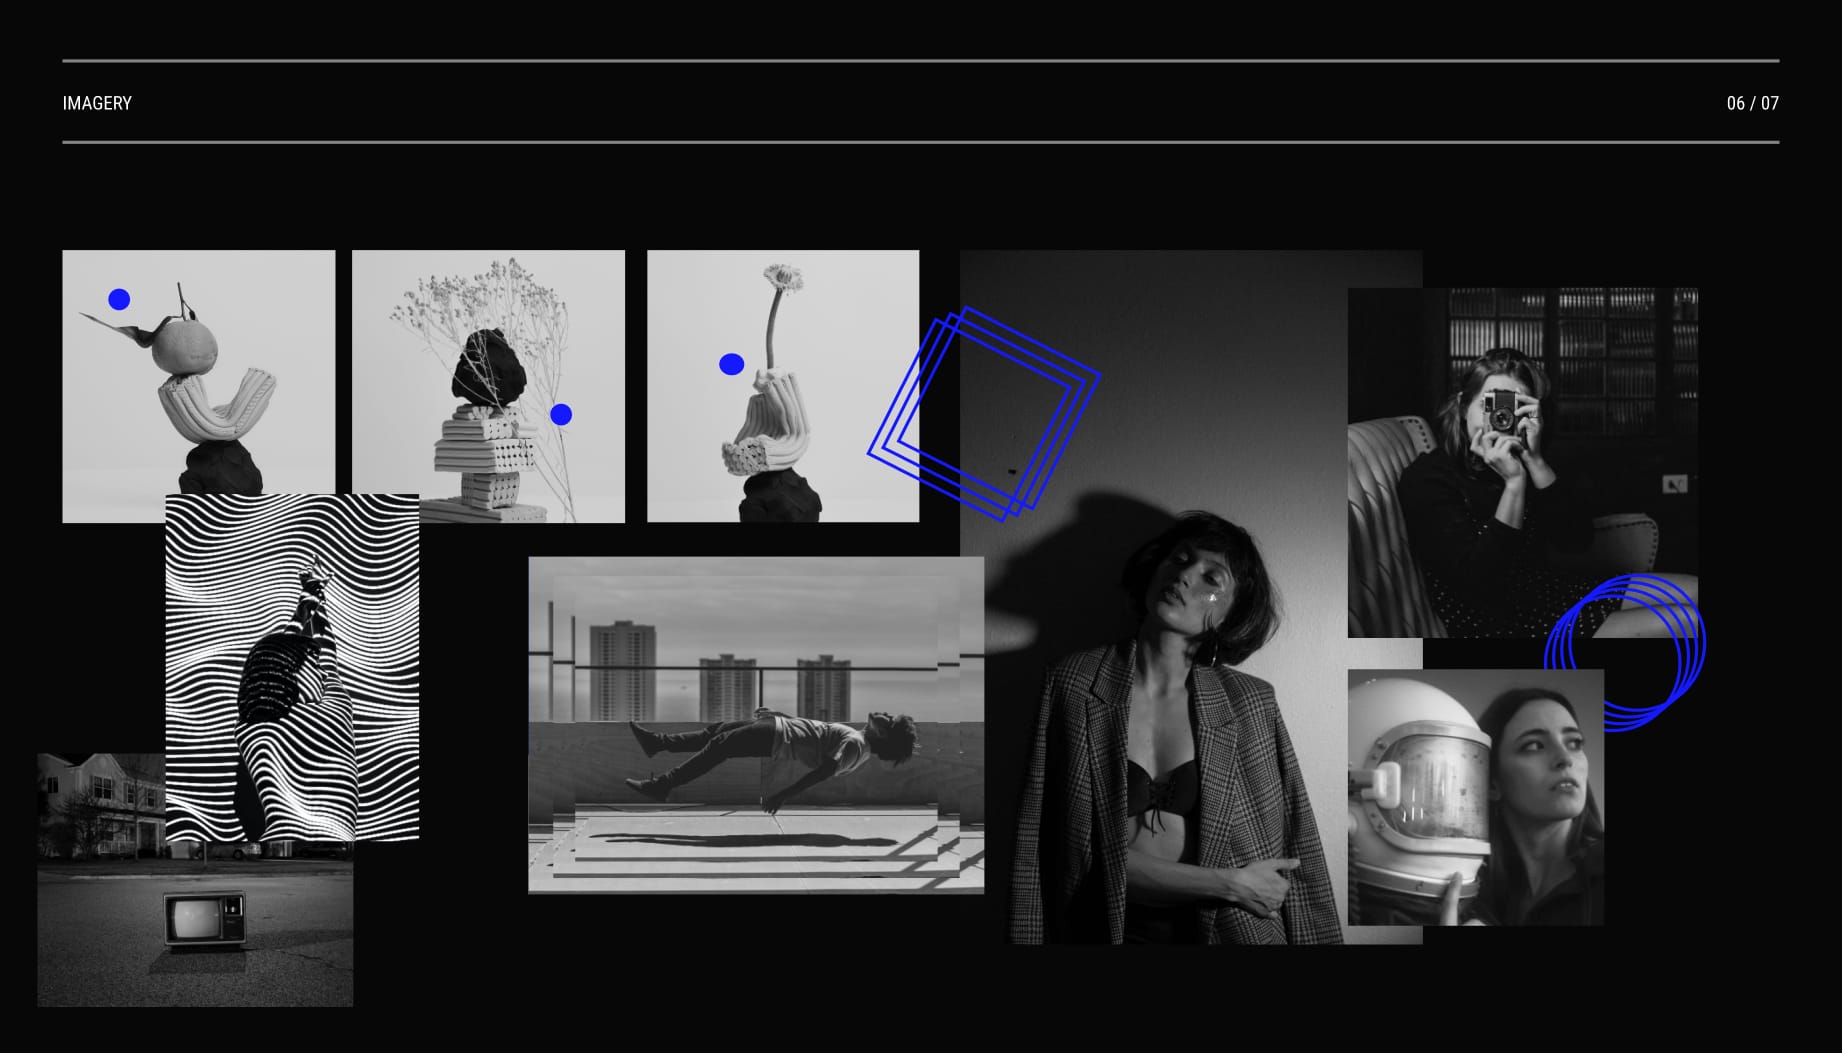
If you don’t have the budget to hire a professional photographer, check out Unsplash and Pexels for high-quality, license-free photos. Here are a few tips and tricks to help you find the right photos that both speak to your brand and look cohesive:
Try different types of search queries, like specific queries (“woman surfing in bali”), general queries (“summer”), adjectives (“calm”), verbs (“surf”) and places (“Canggu”).
Look back at your mood board and search keywords that describe your favourite images. Test different combinations of words, phrases and synonyms.
View related results of images you like – you’ll sometimes find better photos that way rather than scrolling endlessly through your original search query.
Check out collections other people have curated. This is a quick way to find photos under a single theme.
When you find the perfect image, click through to the photographer and see their entire photo collection. This is a great way to find photos from the same shoot and in the same style.
Experiment with photo filters, exposure, colour saturation and tints on Canva, Figma or any photo editing tool to create a more cohesive look to your selected images.
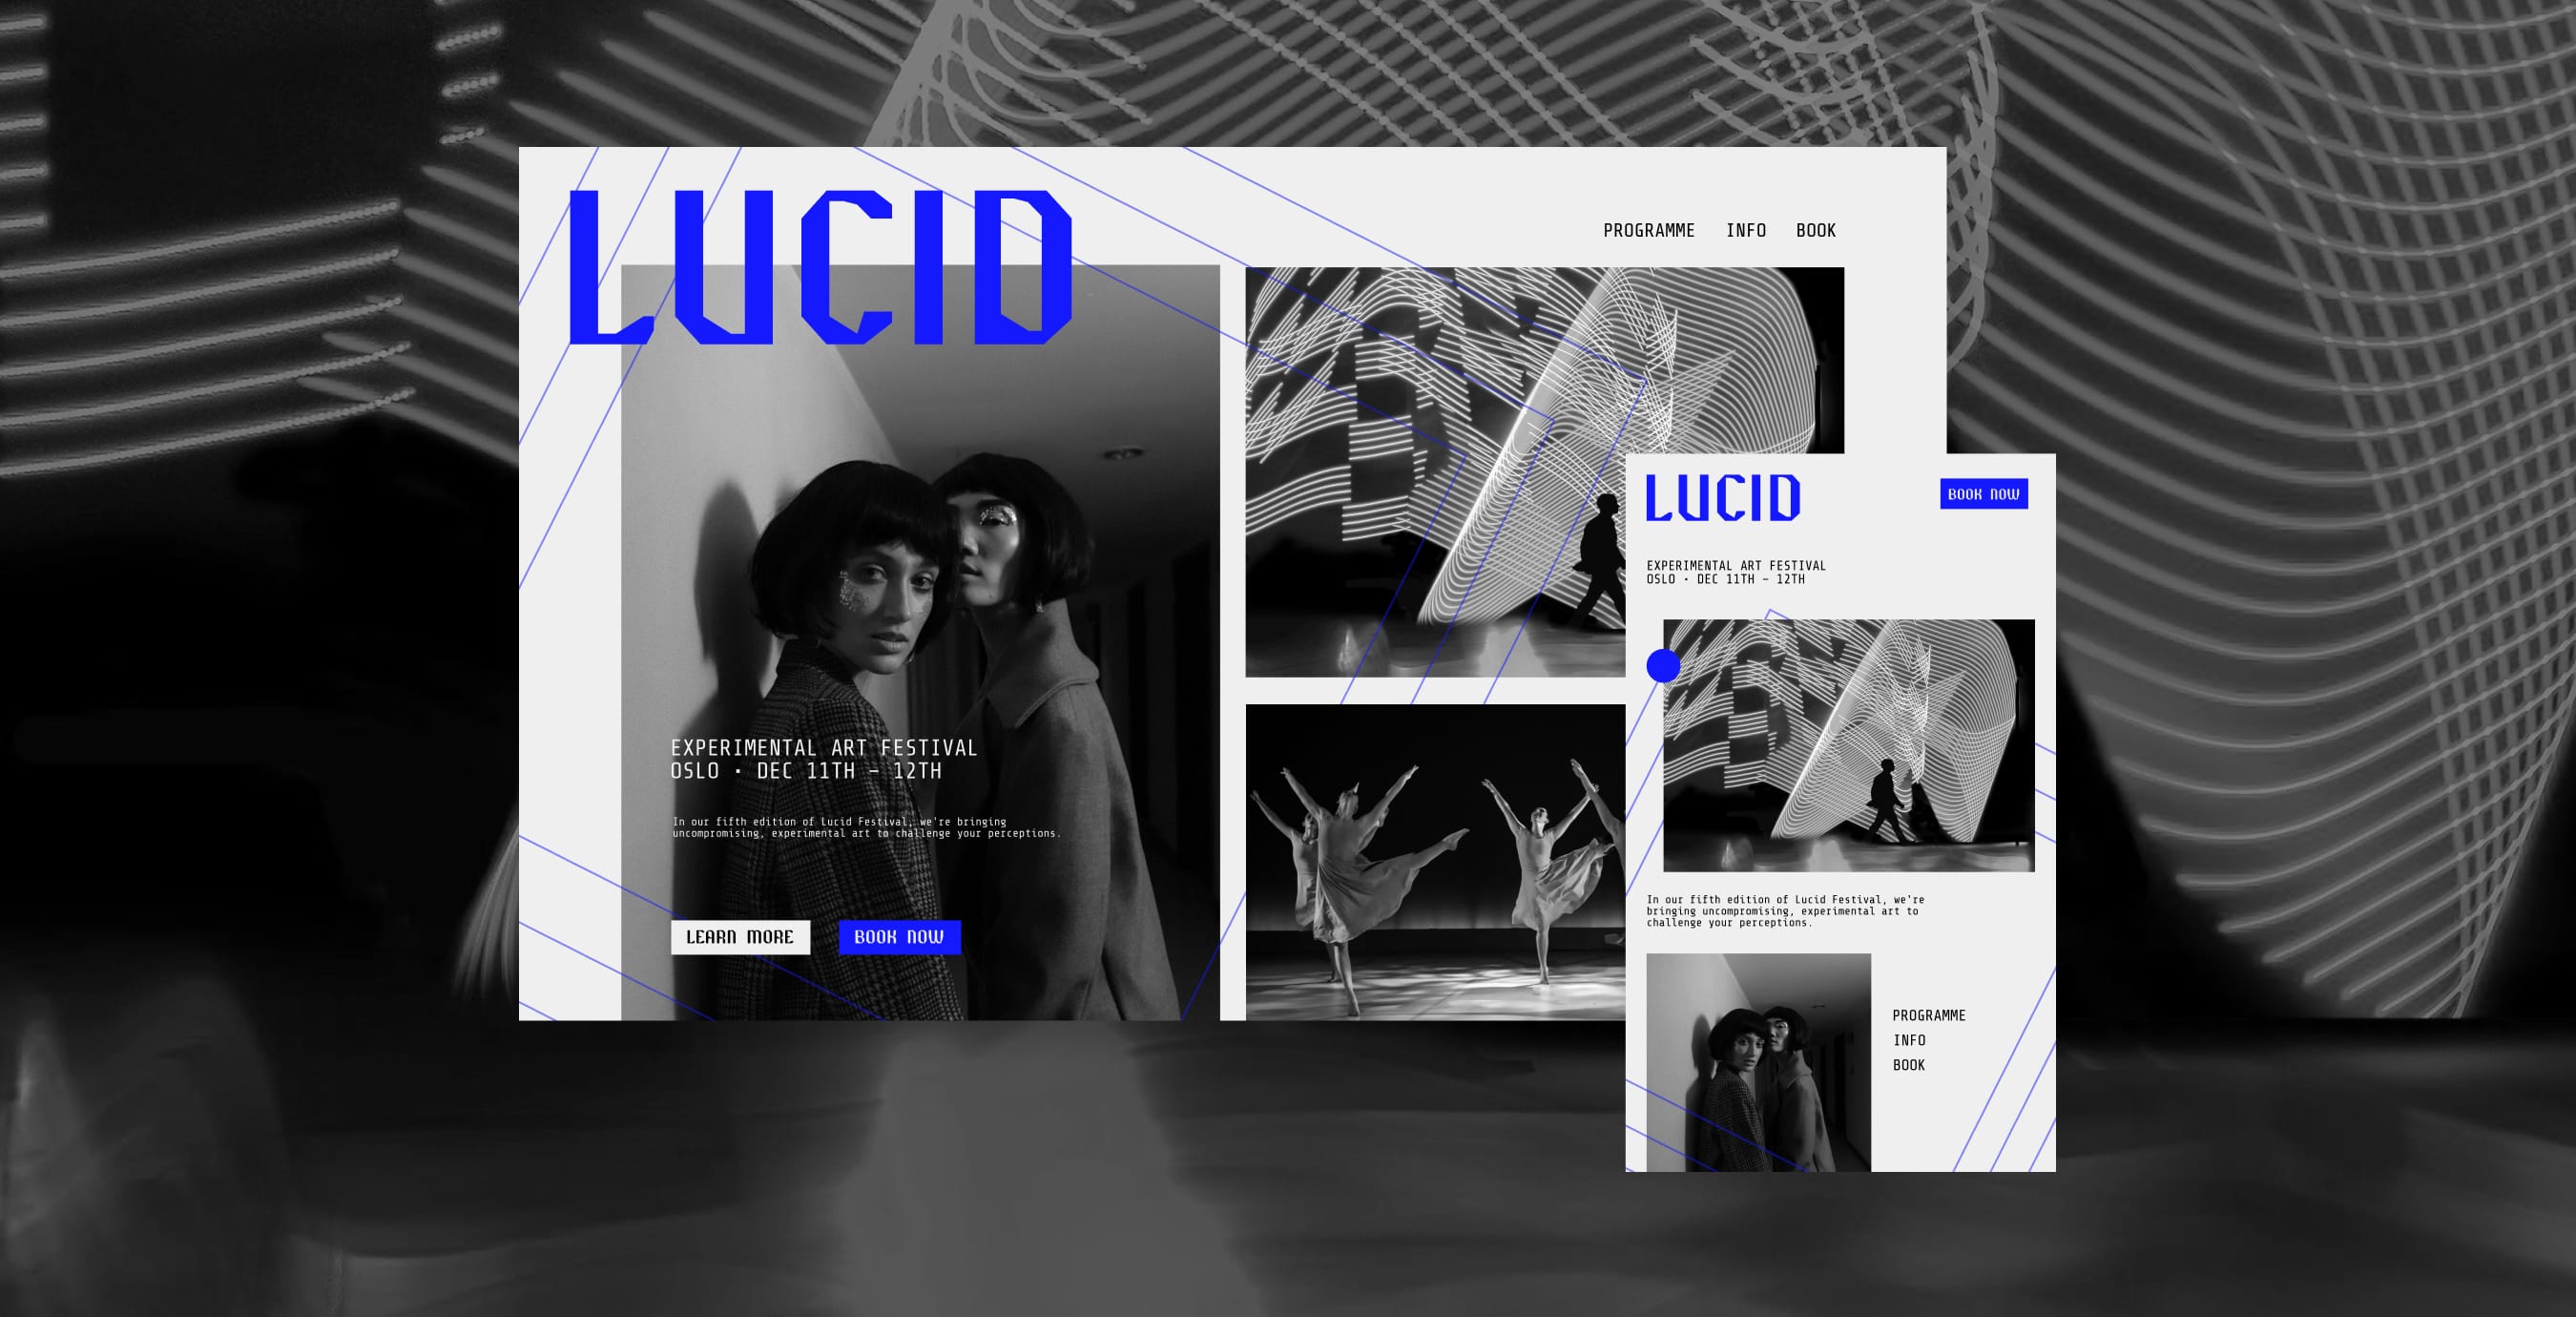
7. Create your website!
Finally, you’ve got all the brand assets you need to build a beautiful website. All that’s left to do is to configure your website theme with your new assets. To learn more, check out our step-by-step tutorial on customising Easol themes.
Build your website on Easol today
We believe that with the right tools, anyone can turn their passion into an empire. As an all-in-one experience commerce platform, we don’t just let you create a beautiful website with themes – Easol’s packed with marketing features to help you launch and sell more experiences.
Ready for the next step? Book a demo now to get started.
Lisa Simpson
Chief Creative Officer
Share Post